Trees not removed with proper care can cause extreme damage which is why you should let tree services cut down trees. However, if you’re going to cut down the tree on your own, it is better to cut it down in sections. Here’s a complete step-by-step guide of how you can cut down a tree in sections.
When Is Tree Removal Necessary?
Trees are a savior of the environment. And we’re usually encouraged to plant more trees. But certain circumstances require tree removal.
For instance, when a tree is planted too close to the building, it causes damage to the property when it grows out. Also, after a specific time, the roots come out, damaging themselves and the wires or pipes underground. Also, it damages the pathways and patios.
Secondly, when a tree passes its certain maturity age, it either dies or gets sick. Eventually, the result is a damaged tree of no use with an ending structure. Such a tree must be removed before it falls on someone.
Moreover, sometimes two trees are planted too close to each other that they crowd each other. Or maybe the tree is coming in the way of some electric wires.
A tree is also removed when some construction is needed to be done in the space.
Required Kit
Following are the things you must have before you start the process:
- Tripod Ladder
- Chainsaw
- Rope
- Gloves
- Long Pants
- Long Sleeve Shirt
- Goggles
- Pruning saw
- Boots
Clear The Area
It all starts with clearing the area under the tree. It is where the tree is supposed to fall. So, make sure there’s no broken stuff down there, no kids, and no vehicle. Also, it will be a more professional approach if you clear all the debris and trash down there.
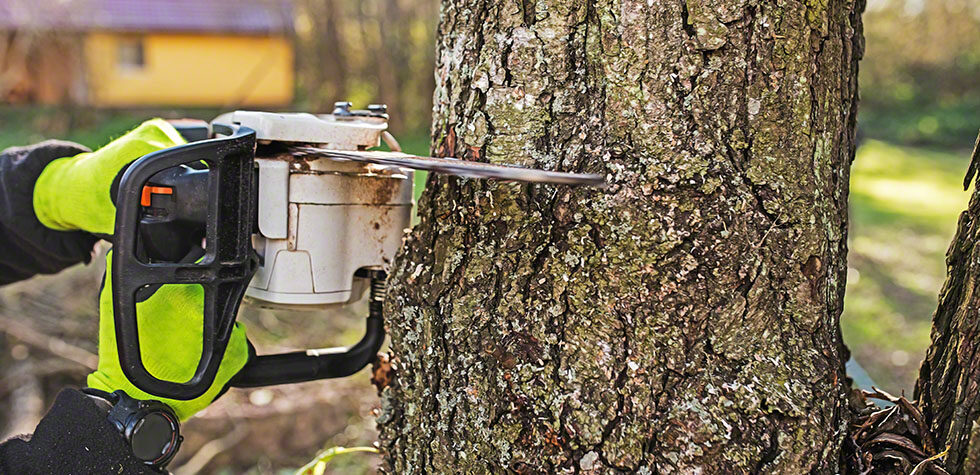
Start With “Limbing” Of The Lower Level
Now begin the process by cutting off lower-level branches or with limbing. Make sure you’re properly covered before cutting a branch.
You can use a chainsaw to cut the side branches. Never cut a branch that is above your shoulder height while standing on the ground. Or else, there’s a risk that the branch might fall over you. Ouch!
Keep cutting until you’re done.
Removal Of Branches With A Rope
You can remove the upper, heavy branches with a rope. After pruning smaller branches from the more giant branch:
- Wrap a rope around it
- Cover the other side of the rope with the upper branch
- Take the rope all the way down and wind it around the tree trunk
- Pull the rope until the branch falls off with tension
Cut Your First Section Down
Now you’re supposed to start with the upper level of the tree. Use a tripod ladder to climb up. Make sure you’re tying the ladder properly with the tree while the ladder is leaning with the tree.
Start off by measuring segments. Also, never carry the chainsaw up the ladder. Instead, use a rope and pulley to pull it high. Now give your segment its first cut, cutting it 70 degrees downwards. Then, lean the segment towards what section of the ground you want it to fall. Now finally, give your segment a second cut, cutting it 20 degrees upward.
Second Segment
There’s no change in the process for the second segment and segments after that. You have to carefully cut each section giving it two cuts while making a right triangle. Repeat the process until you reach the stump.
Before You Commit To The Process
- Make sure you’re not cutting some endangered species. So, do your research beforehand.
- Analyze the condition of the tree. Is cutting it necessary?
- Check your local rules for tree cutting first. Some areas do require a written permit.
- Ask a friend for a helping hand.
- Decide a “fall zone” where your tree and the tree branches are supposed to fall.
- Decide where and how you’re supposed to dispose of the branches and the trunk segments beforehand. You cannot just leave the debris there to rot. It is harmful to the safety of residents. Also, it occupies space.
If the tree is near some electric wires, better leave the process to tree removal companies Bethesda. Don’t put your yourself in serious danger.